Private Reserve Inks Essential Kit - 8 oz. Fountain Pen Flush Kit
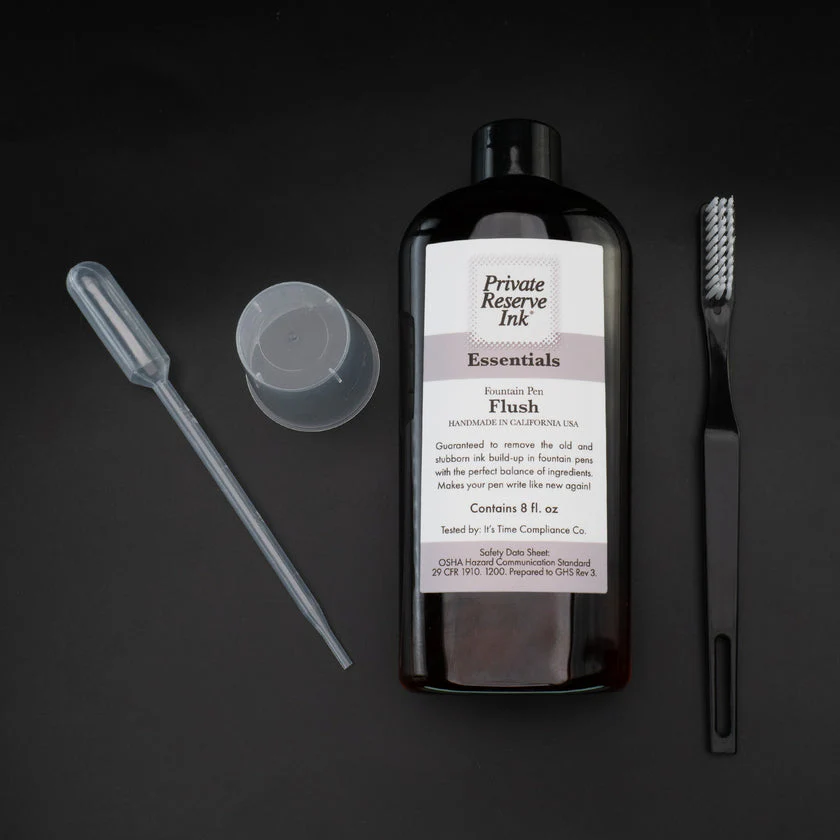
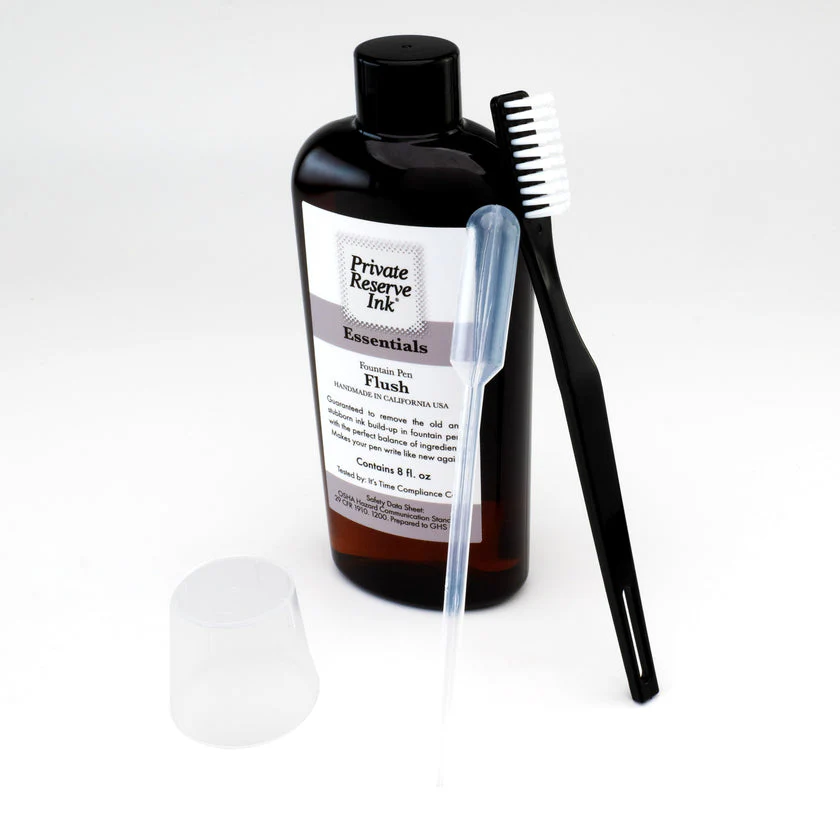
Kit Includes:
• 8 fl. oz. Pen Flush Bottle
• Brush
• Pipet
• Measuring Cup
Guaranteed to remove the old and stubborn build-up in fountain pens with the perfect balance of ingredients. Makes your pen write like new again!
Step 1: Disassemble the Fountain Pen
- Carefully unscrew the barrel and separate the nib and feed from the pen's section. If your pen has a cartridge or converter, remove it as well.
- Note: If your pen's warranty does not permit disassembly, consult the manufacturer's cleaning instructions.
Step 2: Measure the Pen Flush
- Use the measuring cup from the kit to pour the full cup of pen flush.
- Ensure you're measuring on a flat surface for accuracy.
Step 3: Clean with the Brush
- Dip the brush from the kit into the pen flush in the measuring cup.
- Gently scrub the feed, nib, and other components to remove ink residue. Avoid applying too much pressure to prevent damage.
Step 4: Soak the Pen Components (optional)
- Pour the measured pen flush into a small bowl or container.
- Submerge the disassembled pen components (excluding plastic or sensitive parts) into the pen flush and let them soak for a few minutes. This will help break down stubborn ink residues.
Step 5: Use the Pipette for Targeted Cleaning
- Draw pen flush into the pipette from the measuring cup.
- Carefully apply pen flush to hard-to-reach areas, such as the inside of the feed or the ink channels. This step is especially useful for thorough cleaning.
Step 6: Rinse with Clean Water
- After cleaning with the pen flush, rinse all pen components with clean, lukewarm water. This will remove any residual cleaning solution.
- Ensure you rinse thoroughly to avoid any lingering pen flush.
Step 7: Dry the Pen Components
- Gently pat the pen components with a lint-free cloth or paper towels to remove excess water.
- Allow all parts to air-dry completely before reassembling the pen.
Step 8: Reassemble the Fountain Pen
- Once all parts are completely dry, reassemble the pen in the correct order.
- Make sure everything is secure but not overly tight.
Step 9: Test the Fountain Pen
- Test your pen on a piece of paper to ensure the ink flows smoothly. This will confirm that the cleaning process was successful.
Product Information
Product Information
Shipping & Returns
Shipping & Returns
Description
Kit Includes:
• 8 fl. oz. Pen Flush Bottle
• Brush
• Pipet
• Measuring Cup
Guaranteed to remove the old and stubborn build-up in fountain pens with the perfect balance of ingredients. Makes your pen write like new again!
Step 1: Disassemble the Fountain Pen
- Carefully unscrew the barrel and separate the nib and feed from the pen's section. If your pen has a cartridge or converter, remove it as well.
- Note: If your pen's warranty does not permit disassembly, consult the manufacturer's cleaning instructions.
Step 2: Measure the Pen Flush
- Use the measuring cup from the kit to pour the full cup of pen flush.
- Ensure you're measuring on a flat surface for accuracy.
Step 3: Clean with the Brush
- Dip the brush from the kit into the pen flush in the measuring cup.
- Gently scrub the feed, nib, and other components to remove ink residue. Avoid applying too much pressure to prevent damage.
Step 4: Soak the Pen Components (optional)
- Pour the measured pen flush into a small bowl or container.
- Submerge the disassembled pen components (excluding plastic or sensitive parts) into the pen flush and let them soak for a few minutes. This will help break down stubborn ink residues.
Step 5: Use the Pipette for Targeted Cleaning
- Draw pen flush into the pipette from the measuring cup.
- Carefully apply pen flush to hard-to-reach areas, such as the inside of the feed or the ink channels. This step is especially useful for thorough cleaning.
Step 6: Rinse with Clean Water
- After cleaning with the pen flush, rinse all pen components with clean, lukewarm water. This will remove any residual cleaning solution.
- Ensure you rinse thoroughly to avoid any lingering pen flush.
Step 7: Dry the Pen Components
- Gently pat the pen components with a lint-free cloth or paper towels to remove excess water.
- Allow all parts to air-dry completely before reassembling the pen.
Step 8: Reassemble the Fountain Pen
- Once all parts are completely dry, reassemble the pen in the correct order.
- Make sure everything is secure but not overly tight.
Step 9: Test the Fountain Pen
- Test your pen on a piece of paper to ensure the ink flows smoothly. This will confirm that the cleaning process was successful.